 The first tall building I made came from a picture in a catalog I found. It is important to work off of reference material from the era in which you are building. I am lucky enough to live in an area where many of the buildings were built in the 1800's, so aside from catalogs I can drive around town and take pictures of interesting sites. This building is built in the same manner as the others. I made it large enough for one of the other buildings to fit inside for ease of transport. Since all the ceilings are removable, they can be used to transport scenery and models. The facade of the building was made slightly differently from the last. Instead of gluing on little bits of frame to make windows, I started with a sheet of paperboard (cereal box) and cut the window shapes out. I then sheathed the building with four of these. The paperboard gave a smoother finish than the cardboard and created some depth as well. The large bay window was constructed from some scrap pieces and sheathed in layers of thin card. This is where you can really add some detail. I laid out the basic shape of the windows with some 1/4" pieces and then glued some 1/8" pieces on top of them for a little more detail. A sharp knife will help here and exact measurements when making the basic shape. Keep the lines and corners neat and tidy.
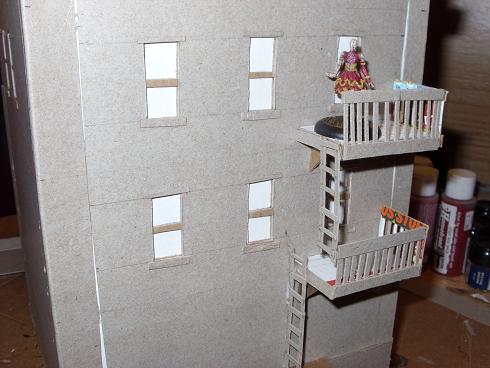


Here is the town so far with a few add ons. The roof pieces are removable. In order to get a nice texture on them, I glued down sandpaper, painted it black, and dry-brushed on some grey. The clothesline is simply a piece of wire with some pieces of white paper folded over and glued to it. I punched some holes in the sides of the buildings to attach it. The pipe on the left is for a refrigerator's ice maker. It is flexible tubing and comes with a set of valves and joints. You may find the same thing around aquariums. In order to keep the pieces straight, I clipped up a plastic coat hanger and slid it inside each piece of tubing. Each section is removable and the joints allow me to set up any configuation I want. The building on the bottom left has an extra layer of detail that I decided to add to the rest of the buildings. Malifaux itself is supposed to be built on top of an older city. I reasoned that the slum might be brick and wood construction on top of older stone foundations. In order to achieve this effect I grabbed a piece of styrofoam and set to work.
 Using a sharp knife I cut out some small rectangles and a few corner pieces. The foam came from a packing crate and was not particularly dense. This makes it hard to work with but does have a nice stoney character when done. A sharp knife is very important here. With the basic shape cut out I cut in joints. In order to do this, simply make two cuts down the length of the foam at a 45 degree angle. this will remove a thin "V-shaped" strip. Then do the same on the vertical and create the shape of each stone. If not using a knife, you can achieve the same effect by drawing on the bricks with a sharp pencil. For a little extra detail go ahead and cut out some stones or crack off some corners. I put on some black paint and drybrushed them with a mix of blue and grey. Once dry I affixed them to the buildings with some white glue. Don't use super glue or spray paint! It will melt! The slum was looking pretty good but I needed to add my walls, difficult terrain, and objective counters.
-Maniple
No comments:
Post a Comment