Showing posts with label Malifaux. Show all posts

Thursday, December 8, 2011

300 Challenge: 3 Warbands

I am pretty happy with my progress on the 300 Challenge, but I am not likely going to complete it before I go home for Christmas Break. I lost too much time in November. Still, I have accomplished quite a bit. Here is my 25 point Circle list that will be going into the tournament. Cassius, a Stalker, a Woldwarden, some Reeves with UA, and Lord of the Feast. This band has worked pretty well so far, but I will be playing some new armies and will not have much of a chance to practice against them. In particular I am worried about facing Everblight. That army can basically ignore my feat and that is a bummer
 I also cracked out some stones for bigger games. These were easy to put together, but surprisingly tricky to paint. I made the mistake of painting them grey first and then going back in to do the green. I should have gone in the opposite manner! Still they look pretty neat and should be a nice addition to the army.
 For Malifaux I spent some time on my Hoffman band. This was one of the easiest to paint, as I simply painted most of the army brass and inked it for some shading. I picked out a few details and called it good. I actually spent more time on the bases than the models. They are Deus Ex Mahina from Iron-Halo.net.
 I especially like the glowy orb.
 Hoffman was pretty easy to finish as well. I should have left the apparatus off his back and painted it separately, as some of the pieces were hard to reach. There are also some neat conversions out there that bulk up the suit and make it a little tougher looking. Maybe when I get home I can crack it appart and have a go.


 My final piece for tonight concerns Gutshot! My new game. I ordered the book online and some minis from Black Scorpion. The paint job is a little quick and dirty, but I needed to get them done before heading home. We will try the game out for the first time and I wanted something half way decent to play with.
 The detail is pretty respectable, but I did have a hard time cleaning up the ones that were resin. I got 10 cowboys, 5 outlaws, and 2 guys on horseback. I haven't based them yet, as the material I want to use is back home. I also opted to use round lip bases even though they came with GW style. I think they look a lot better. I need to order a few more, as the game does call for townsfolk, indians, and banditos. All in good time, however, there is still plenty left to paint on the table!

Last week I had finished 135 models. I have completed 20 for Circle, 5 for Hoffman, 17 for Gutshot, and three from the odds and ends pile. This gives me a grand total of 180! I can still get pretty close to my goal tomorrow if I speed paint some 40k guys that I have sitting around. Wish me luck!

-Maniple

Monday, November 7, 2011

Hell on Wheels Review

Last night I watched the premiere of "Hell on Wheels" on AMC. I watched it in the hope that it might offer some inspiration for my games of Malifaux. I enjoyed the pilot and here is my review.

Synopsis:
The lead is a gunfighter named Cullen Bohannon (played by Anson Mount). Without giving too much away, he was a soldier who fought for the Confederacy during the American Civil War. We are not told much about him, but he appears to be on some sort of revenge mission that leads him to Council Bluffs, Iowa, where the Trans-Continental Railroad is beginning to be built. Colm Meaney plays Thomas Durant, a rail baron. He is the titular bad guy, but in a neat soliloquy he mentions that without him, America would never be truly great. Elam Ferguson (played by Common) is a worker on the railroad and an emancipated slave on Bohannon's crew. There are fights, drinking, a baptism, and a raid by Indians. The train is pretty cool as well.

Themes:
The revenge theme is pretty clear from the very beginning and provides the basis for several character's motivations.
There is also an element of self-preservation and desire for power. Durant, in particular, is motivated by the opportunity he has been given to make something great while also making an incredible fortune.
There is no supernatural element in the show. This series is being played as a straight Western with no magic, voodoo, or steampunk whatsoever.

Sets:
Here is where I think that some Malifaux inspiration can be found. The conflicts we have seen take place in several different settings. On the plains, we see a campsite attacked by Indians. I had not thought to make a setting like this, but it would be perfect. There were several wagons, a couple fires, and a bunch of straight-sided canvas tents. This kind of battlefield would give a good mix of cover, breakable terrain, and lanes of fire.

There is also the semi-permanent work camp around the rail line. I like the idea of a section of unfinished rail, piles of dirt, stacks of ties, and half wood, half canvas shacks. The wagons being used are also distinctive. The preacher and his band even have a wagon with a steeple on the back.

Music:
The soundtrack is worth a look. I have several of the songs featured on the show, and all would make a good Malifaux soundtrack.

Conclusion:
Despite the lack of any magic or steampunk elements, I think the show can help get you in the mood to Malifaux. It is pretty dark, gritty, and has an acceptable level of violence. I hope the show takes off and does well!

-Maniple

Friday, October 21, 2011

Malifaux Terrain: The Mansion Part 5

I spent a few day doing some detail work on the mansion. One of my goals when starting this project was to add as much detail as I could without resorting to lots of pre-made bits. I could easily by some plastic window kits, but on a project of this size, the price would mount pretty quickly. Instead, I went out to the local craft store and picked up a few basic supplies to start working on the windows. So far I am pretty happy with how they are working out.
 I started with painting them brown. If you leave the paint fairly thin, the wood grain shows through nicely. Along with the popsicle sticks, I had a bag of long thin bass wood strips that would work for trim and the window cross bars. I used a pair of clippers to snip the popsicle sticks to the right length for each window frame and then beveled the edges so they would fit together at a nice 45 degree angle. each window is slightly different, so each piece was trimmed individually.
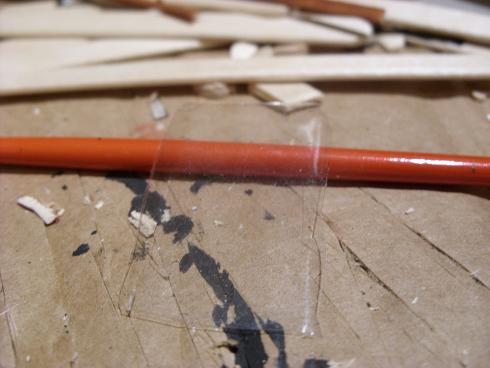
 From an old miniatures package I cut out some rectangles of clear plastic for the windows. On some of them I cut lines to simulate cracks and other had a corner cut off to simulate breakage.
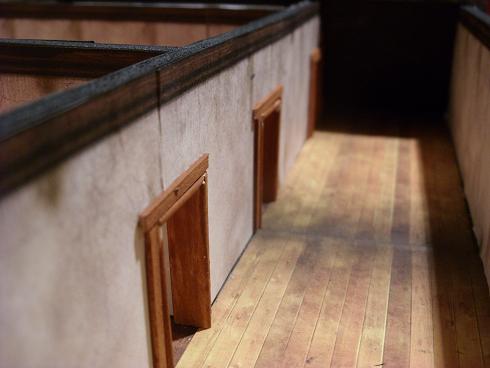
 Here are some of the finished interior doorways. I glued the top piece in first then slid the side pieces in underneath so they fit snugly. Using the thin bass wood strips, I created a simple frame around them. This adds a further level of detail and also hides the places where the wallpaper was cut out from the doorway. A little white glue holds the whole thing together.
 The windows took a little more work, since I had to fit four pieces together plus two more for the cross pieces. A few of the window frames are a bit wonky, but I did not correct them. I want the building to look dilapidated and uneven so it fits with the ethos of the place. I used a drop of superglue to hold the plastic window pieces in.
 The interiors are finished in a similar fashion as the doors, with a frame that goes all the way around. This level is just about complete. I will order some furniture soon and put a few pictures on the wall.
Here are the first two levels finished!

Well, mostly finished. I have decided that the roof line is just not working for me. I may cut the peaks of the roofs of and rework them to be flat topped. But that is a project for another day...

-Maniple

Sunday, October 16, 2011

Malifaux Terrain: Creepy Structure Part 2

I painted up the little house as a test piece for the Malifaux mansion project. I wanted to see what the best way might be to paint the siding, in particular. I want this house to be "Malifaux" in that it looks innocent at first glance, but then becomes horrible on closer examination. 
 I did something new with the windows this time by painting in some curtains. i will admit that they look pretty crude up close, but from a distance actually look very nice. I don't want a really polished look on my stuff anyway. Malifaux has kind of a storybook feel to it, so more abstract terrain seems to fit better along with the models.
 I also deliberately skewed some of the angels, particularly on the window frames. This contributes to the overall look rather subtly, just like the mismatched shingles. I could have bought all my siding and windows online from a plastic kit manufacturer, but that just doesn't interest me as much. The bricks were painted in various shades of brown and red but I think they still need a highlight so it stands out more. I need to get a hold of some cotton balls to make some smoke for the chimney. I think that will go a long way to show that something horrible is happening inside.
Here is a close up of the front windows. What is happening in there? Well, bad things happen...


-Maniple

Thursday, October 13, 2011

Malifaux Terrain: Creepy Structure Part 1

This is a little house I started last year. I want something to represent a creepy structure in Malifaux. So far it looks pretty innocent, but my plan will be to situate it in a piece of creepy terrain. The chimney will have a large plume of smoke and the windows will reflect some creepy firelight from inside.
 The house is simple foamcore sheathed in card strips. I will next fashion a decent sized base with a few creepy trees, a fence, and a walkway. Maybe some gravestones out back?
I would also like the building to be removable from the base. I plan on creating a little diorama with stuff going on inside, like a fireplace, a dining room table, and maybe a rocking chair in the corner. We'll just have to see.

-Maniple

Malifaux Terrain: The Mansion Part 4

This doesn't look like much, but I was having a problem joining the round roof to this tower. The tower itself is round at the front and square at the back. In order to join it up I layered several pieces of cardboard and carved it to blend the two shapes together. Once done, I shingled it and attached to old roof. It now has a much better fit and looks quite a bit better from all angles. next step will be to frame out the big window.

This is a project I was not looking forward to. I have done thousands and thousands of shingles and I find the work very tedious, especially on long ranks like these. So, I plugged into a new podcast and took an afternoon to finish it up. Now I need some paint to try and bring it in line with the rest of my Malifaux buildings.


The biggest job, of course, is finishing the siding. Like the shingles, this just took lots of time. Once I had all of the card cut out, it didn't really take me all that long. The corners and windows of course take a little care. Next step will be window and door frames. I need to see if I can get my hands on some balsa wood for this job. It will be a little more sturdy than card and look better when painted. Speaking of paint, once I finish a few other projects I will get some color on this.


-Maniple

Monday, October 10, 2011

Malifaux Terrain: The Mansion Part 3

 It has been quite a while since I did any work on the mansion. It was looking fairly good, but the exterior design really bothered me. The "columned" look I was going for did not look right at all. I couldn't decide how to paint it and the various gaps and uneven corners were driving me nuts.

I always go to my standard solution when things are looking bad- the humble card strip. I took a sheet of paperboard and marked it off in 3/8" lines.
 With my handy razor blade I carefully cut them out and then made about 50 more.

If you are attempting a project like this, take necessary precautions, namely: use a sharp knife, lay out sheets of cardboard to protect your desk, and keep all your cereal boxes so the evil recycling fairy doesn't take them away.

Also measure and cut carefully. That is important.
 I started on the back of the house at the top. I reasoned that if I didn't like how it was turning out, this would be any easy tear-down and replace. I started at the bottom and carefully layered each strip over the top of the one below. I used a little white glue to stick them down and my old sprue cutters to nip off the edges.
 I determined that it was looking good, so I went after the tower next. In order to get the pieces to lay flat, I had to slice off all my old trim pieces. This was a little tricky, but a very sharp knife helped out.

This tower took me quite a while to finish since there were a lot of small pieces to cut out around the windows.
 As you can see, it is coming right along. I am not too worried about getting the corners super neat. I want it to look run-down and neglected. The rough corners give it a nice look. I also trimmed off the balcony-things that ringed the tower. What were those for?

I briefly considered using balsa wood for this project, but there are a lot of places where the siding needs to bend. Also, it would have likely been too thick. I am going to paint the thing anyway, so card was my best option.
The siding will be painted to match the shingles, but in a darker shade. The siding will be black, with just a hint of blue-gray on the highlight.

The round tower will get some kind of stone treatment. Not quite sure what it will look like, but perhaps I think of something later.

Here is a close up of the work. The boards are uneven and ill-fitting. Perfect. It finally looks like a haunted house!

Now I only have the two main floors to go. Wish me luck!

-Maniple

Sunday, September 25, 2011

300 Challenge: Dead Justice Part 4

I am pretty happy with how these are turning out. The Malifaux models proved to be quite a challenge. I only managed to complete seven of them this weekend, compared to the twenty-five+ guardsmen I turned out last weekend. The worst of it is that while I should be about done, I keep finding things I need to go back and fix. They will have to wait for now since I am at the point where I am fussing over them and will probably do more harm than good. When I do get back to them I need to add a little more blood and gore. i know they are yet too clean!


This brings my total to 68. This means that in order to meet my challenge goal, I need to grind out 32 more models in the next five days! How will I ever manage that? Maybe I need to start thinking "smaller."

-Maniple

300 Challenge: Dead Justice Part 3

 This project is taking a long time. I have been spending a lot of time going back shading and highlighting. I want to get all the tones just right and it has been tricky. This stage represents a number of steps after my last post, but it does not look significantly different. The idea with a wash or a highlight is that you don't want to move too fast and apply the paint too thick. A good wash will be very much thinned down with very clean water. The temptation is to glob on the paint and do it quick. This leaves the model without any depth and details obscured.
 Here is another highlight yet. We are getting there!
 I tried something new with this model. Blacklining is a technique where black or another very dark color is applied at the point where one color meets another on the model. This defines the area clearly and makes the light colors stand out a little better. I thinned down some black and applied it with a very thin brush. In order to get it as exact as possible I even broke out my 3x magnification eye glasses. After applying the line, I went back and cleaned up any parts where the black wasn't neat. I think it makes here look pretty good!
Lady Justice is looking pretty good, too. I need to pick out a few more details but I am finally happy with the shade of the skin. There are also a few more metal bits to work on and I need to put an inscription on the gravestone. Next I will move on to the Death Marshals and get them finished. They shouldn't take quite as long, I hope.


-Maniple

Friday, September 23, 2011

300 Challenge: Dead Justice Part 2

 Work continues on Dead Justice (and others). These Malifaux models make average space marines seem like children's toys. They are much more delicate and the features are much finer. In some ways they are easier to paint because the features are so well defined, but on the other hand they are more difficult because I am actually having trouble seeing them under the paint brush.
 Lady Justice got some work done on her pants and hair. I am using Dark Flesh with progressive highlights in order to get red hair. I think it will work. It is also a good next step for some of the leather. I also got my black out and fixed up some earlier mistakes. This seems to be a constant process on these minis- i have to learn to be more careful with the brush.
 The wood started with Scorched Brown, highlighted with Bestial Brown, then a mix of bestial Brown and Bubonic Brown, then straight Bubonic Brown. The coat has been highlighted as well with Bestial Brown over Dark Flesh.
The highlight is looking good, but I know I am going to have trouble with the flames. Still, the models are very cool.


-Maniple

300 Challenge: Dead Justice

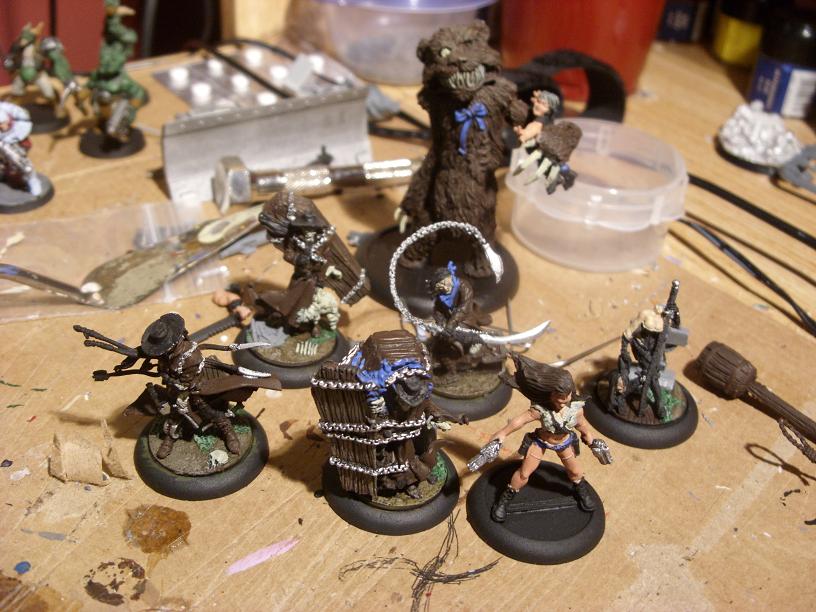
 I came back from Gen Con with a pile of new Malifaux models. Here is "Dead Justice," the limited edition version of Lady Justice and her crew. On the left is the limited edition gunslinger, Miss Demeanor. I put Lady J. and her buddies on some graveyard bases and the gunslinger will have a noose on hers. Some of them I pinned and lgued to the bases, others are left free so that I can paint the base under the model. I can glue these down when I am done.
 I also have the Nightmare edition Teddy. I modeled him catching a bite to eat. I do not have a base yet for Teddy, I will probably order the orphanage set for him from Wyrd. The spray paint did not basecoat him particularly well. I went back and filled in the missing parts with some thinned-down black paint.
 I started by doing a little work on the bases. They are mainly green and brown, but there are a few interesting things I will pick out later There is a lot of fur, leather, and wood on these models so I went ahead and hit them with some Scorched Brown. I find this to be a nice base coat for any number of these tones. With a wide array of browns and grays I can highlights and blend each texture differently from the same basecoat. for instance, the bear will end up sort of sandy brown, like an old well-used teddy bear. The wood will have dark recesses and an extreme highlight. The leather will stay fairly dark, reddish, with a glossy finish.
 I wanted to define some of the details right away so I could keep them distinct from others. For instance, I did not want to get the Judge's kerchief blended into his hair or the coffin flames covered in wood tones. A little blue paint made those bits bright so I could be sure to keep the brown away from them and make my job harder later. Some of the brown bits also received a preliminary highlight at this stage. A light drybrush with a tan color and pick out details the eye can miss. I also reshaped the Judge's chain, keeping a nice curve to it.
 Here you can see that I began working on metal and flesh. All the metal bits are a light coat of Chainmail, dead flesh is Rotting Flesh, and Miss Demeanor has a basecoat of Dwarven Flesh evenly applied. In order to get a smooth coat, I applied many fine layers rather than glob it all on at one go.
 Lady Justice received a very diluted wash of Dwarven Flesh over the Rotting Flesh base. This creates a splotchy effect on the skin and also gives some shade to the, uh, crevices. I am not looking forward to painting her outfit- it has a crazy amount of detail.
 Miss Demeanor is looking pretty good. This picture will be helpful as a reference since the lighting shows me where the painted highlights should go.

More Soon.


-Maniple

RIP thelowercrypt.blogspot.com

I shouldn't have pressed the button...