
I like the idea of playing "sleeper" armies. These are armies that do not at first appear to be very effective. Usually they involve a new kind of tactic or fly in the face of what most other people are playing. It can be easy to just pick the caster who is biggest and baddest, but I love the moments when I pull out a win against a "top tier" opponent with a lightweight army. Theme is also important to me. The Circle army has lists that allow lots of constructs, lots of werewolves, and lots of ancient forest spirits. Cassius was my first pick for a warlock. Cassius is a druid that functions as the mouthpiece for Wurmwood, an ancient and blood-thirsty tree. I did some research online about his tactics. while many people agreed that he has some nice abilities, he can be hard to win with, does not play well for beginners, and would best function as a second caster in larger battles. Perfect!
To guard him I wanted some beasts that would offer defense and offense. For defense I went with a woldwarden. These guys have tons of wounds, high armor, and the ability to cast some of Cassius's spells. The Warpwolf Stalker can do a ton of damage, has reach with his sword, and can use his natural abilities to hit and run. My next pick was a group of Reeves. These guys are infantry models with crossbows. They can shoot through cover with no line of sight penalties and can die easily in order to fuel some of Wurmwood's abilities. Finally I went with The Lord of the Feast. He is a close-combat monster tooled up to destroy other units and can pose a threat to the opponent's backfield.
I purchased the models at a local gameshop that usually gives a nice discount. I bought all the models at once so that I could paint them all at the same time. When I got the models home I took them out of the packaging and cleaned them up. I used a razor blade (box-cutter) to scrape off any mold lines and a small file to smooth them down. I also washed them in the sink with some soap and water. This removes any chemical residue from the casting process. Before I glued the models together I did some work on thier bases. I used white glue and sand to give the bases some texture. I also set in some little squares of wood that would look like old paving stones when painted up. I wanted the group to look like they were advancing through some old ruins, long overgrown by the forest.
I used two different products to glue the models together. I have always found this to be the trickiest part of the process, especially when dealing with metal. I used super glue and 2-part epoxy. The super glue works fine if the part you are gluing is not heavy. I put glue on both services, making sure that the pieces were clean and flat where they joined. Then I sprayed them with some super glue accelerant (you can get this at the hobby shop). It sets immediately and makes a strong bond.
For the bigger, heavier parts, I used 2-part epoxy. The epoxy is stronger than super glue, but takes about 3-5 minutes to set firm. When I use epoxy I usually also pin the joint. To do this get a small hand drill called a "pin-vice," drill a hole in both parts, then use a small piece of wire to hold the two bits together. Along with the epoxy, this will form a bond that will not break easily.


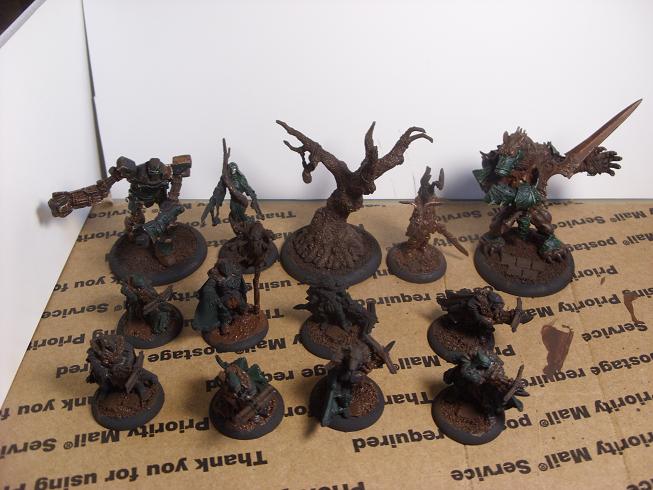
In my next post I will go over some basic painting techniques. This is what my army looks like with just the base colors painted on. From here I will need to layer the paint, do some shading, and finish with a nice highlight.
Now get out and get going on your new army!
-Maniple
No comments:
Post a Comment